
Why Your Exterior Photos Deserve a Little More Thought
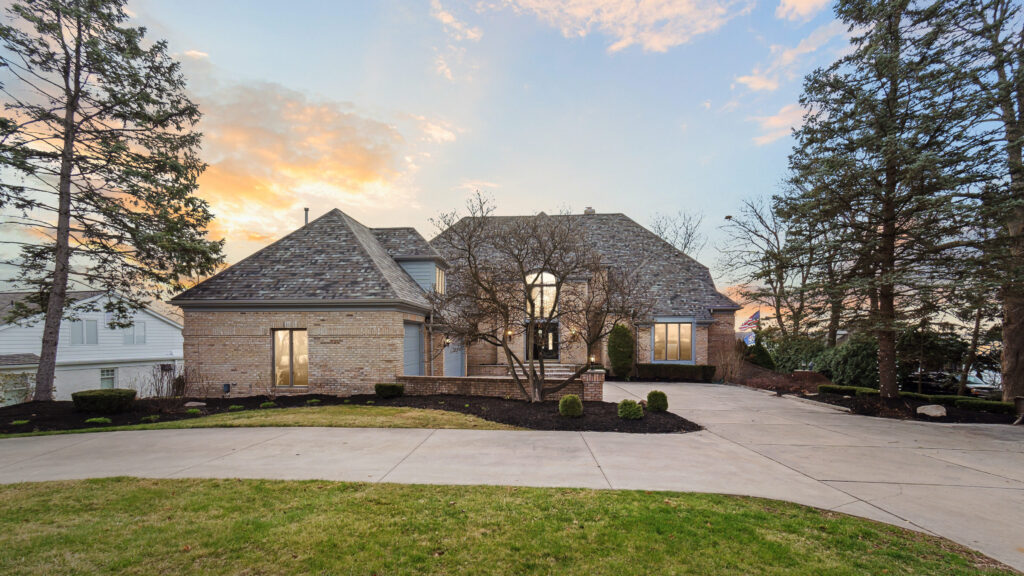
So, you’re itching to head outside with your camera, ready to snap some exterior photos that’ll blow everyone away, huh? I get it—fresh air, cool locations, and the chance to make your Instagram followers a little jealous. But hold on a sec! Before you just start clicking away at random buildings or landscapes, let’s have a quick chat about why a little pre-planning can work wonders.
See, taking exterior photos isn’t just about pointing your camera at something pretty and calling it a day. There’s a bit of an art to it, and it’s not as complicated as it sounds. It’s kind of like prepping for a road trip—sure, you can wing it, but knowing where you’re going and what you want to see makes the journey way more enjoyable. Plus, it saves you from wasting time and ending up with a batch of “meh” shots.
Whether you’re snapping the perfect sunset, capturing your favorite building, or trying to make that random park bench look artsy (hey, no judgment), it’s all about knowing what you want to achieve before you press that shutter button. It’s the difference between a picture that makes you go “Eh, it’s fine” and one that makes you want to frame it or, better yet, brag about it to everyone you know.
So, let’s dive into some tips and tricks that’ll take your exterior photos from good to absolutely amazing. Ready?
Importance of Strategic Planning
Taking photos without a plan is kind of like going grocery shopping when you’re starving.
You’ll end up with a random cart full of snacks and no actual meals. The same goes for exterior photos. Wandering around aimlessly might get you a decent shot here or there, but if you want those next-level pictures, a little planning goes a long way.
Think about what you’re shooting and why. Is it that charming old building down the block or that peaceful spot at the park? Maybe it’s something totally off-the-wall, like a funky mural you’ve had your eye on. Whatever it is, figure out the vibe you’re going for and what you want people to notice first when they see the picture. This way, you’re not just snapping stuff for the sake of it—you’re creating something that grabs attention.
And hey, scouting out your spot beforehand? Total game-changer. Take a stroll, look around, and get a feel for what works and what doesn’t. Maybe you’ll find an angle that makes the place look extra cool or spot something in the background you didn’t notice before. It’s all about giving yourself the best chance to capture something unique. A little bit of thought upfront, and you’re golden.
Considering Lighting Conditions
Lighting is like the secret sauce to taking amazing exterior photos—it’s what can take a shot from “meh” to “wow!”
But here’s the thing: natural light has a mind of its own. It’s not going to wait for you to get your camera ready or adjust your settings, so you’ve got to learn to work with it. Ever heard of “golden hour”? It’s that dreamy window of time just after sunrise or before sunset when the sunlight is soft, warm, and basically begging to be in your pictures. It’s like nature’s way of putting a beauty filter on everything.
But golden hour isn’t the only time to shoot. Midday light can be a bit harsh and shadowy, but you can still make it work—find some shade or use those strong shadows to add drama to your photo. Overcast days? Totally underrated! The clouds act like a giant diffuser, giving you even lighting that’s perfect for capturing details without those annoying hot spots.
Oh, and don’t forget how the direction of light changes your shot. Front light can make colors pop, side light adds depth and texture, and backlight? Backlight is your go-to for those artsy silhouette shots that scream “look how creative I am!” Play around, experiment, and figure out what kind of lighting vibe matches your photo goals.
Choosing the Right Time and Weather
Let’s get real about timing and weather—it’s not just about snapping a pic whenever you feel like it.
The time of day and what’s happening in the sky can totally make or break your shot. Early mornings? Amazing. Not only do you get that soft, golden light, but you’re also less likely to deal with random people wandering into your frame. Late afternoons? Equally solid. The light gets all warm and cozy, making everything look like a scene from a postcard.
And then there’s the weather. Clear skies are great and all, but don’t sleep on those cloudy days—they’re like nature’s version of a lightbox, evening everything out so you don’t get those weird harsh shadows. A few puffy clouds can even add some character to an otherwise boring blue backdrop. Oh, and let’s not forget fog—it’s mysterious, moody, and gives off serious “main character” energy.
But hey, keep an eye on those stormy vibes. Sure, a dramatic sky can look incredible, but no photo is worth soaking your camera or getting caught in a windstorm. Just plan ahead, keep your weather app handy, and you’ll be ready to roll. Or, you know, sprint for cover if it suddenly starts pouring.
Understanding Composition
Onto the fun stuff—composition.
Think of it as the secret sauce that turns a “meh” shot into something scroll-stopping. The way you arrange things in your frame totally changes the vibe of your photo. For starters, the rule of thirds? Total game-changer. Imagine your frame divided into nine equal parts like a tic-tac-toe board. Place your subject where the lines intersect, and boom—instant artsy feel without even trying.
Now, let’s talk angles. Don’t just shoot everything at eye level like some robot. Get low, go high, tilt your camera a bit—experiment until you find something that makes your shot pop. Oh, and leading lines? Amazing. Think paths, roads, fences, or anything else that naturally pulls your viewer’s eyes straight to your subject. It’s like a guided tour for their attention.
Framing is another cool trick. Use things like doorways, windows, or tree branches to create a natural border around your subject. It’s like turning your photo into a little stage where your subject is the star.
And hey, negative space? It’s not “boring,” it’s intentional. Leaving some empty space around your subject can make it stand out even more. Just don’t go overboard and leave people squinting to figure out what they’re supposed to be looking at.
Location and Background Selection
Think of it like matchmaking—your subject and background need to vibe together.
If you’re shooting a cool building, you don’t want a trash can or random cars photobombing in the background, right? Keep it clean, keep it simple. Now, if you’re in the city, those busy streets can actually add some cool energy to your photos—just be strategic about how much chaos you let creep into the frame.
Oh, and don’t forget to move around a bit! Sometimes just stepping a few feet in one direction can totally change the story your photo tells. Got a tree or a lamppost sneaking in where it doesn’t belong? Shift your angle or zoom in a little to cut out the clutter. Also, reflections—have you ever noticed how puddles, windows, or even shiny surfaces can make an ordinary scene look 10 times cooler? Play around with that.
And hey, don’t sleep on textured or patterned walls. Brick, graffiti, old wood—stuff like that can add serious character without stealing the spotlight. Just make sure it doesn’t overpower your subject. Think of the background as the supporting cast—it’s there to boost your star, not compete with it.
Tools and Equipment
Now, let’s get into gear talk—it’s not about having the fanciest setup, but a few key tools can make your life a whole lot easier.
First up, a tripod. Seriously, it’s a game-changer, especially if you’re dealing with low light or want to nail those long-exposure shots. Nobody likes blurry pics, right? Next, if you’re into those wide, sweeping landscape shots or capturing a whole building in one frame, a wide-angle lens is your best friend. It’s like giving your camera a bigger window to see through.
And let’s not forget filters. A polarizing filter? Pure magic for cutting down glare and making colors look way more vibrant. It’s like sunglasses for your lens, but cooler. Bonus: it’ll make those blue skies and reflections look extra crisp. Oh, and don’t sleep on cleaning tools. A dusty lens can ruin an otherwise awesome shot—grab a microfiber cloth or a little air blower and you’re good to go.
For those of you who want to travel light, your smartphone might already have everything you need. Just grab a clip-on lens or a mini tripod, and boom—you’re ready to shoot like a pro without breaking the bank. Remember, it’s not about the fanciest gear, it’s about using what you’ve got to its full potential.
Selling a property? Give us a call today and learn more about our professional photography services that can boost your property listing!
Also, explore our sister company for exclusive luxury listings you won’t want to miss. Don’t forget to tune into our new podcast for even more valuable insights!