
Lights, Camera, Garage! Photographing Detached Garages Made Easy
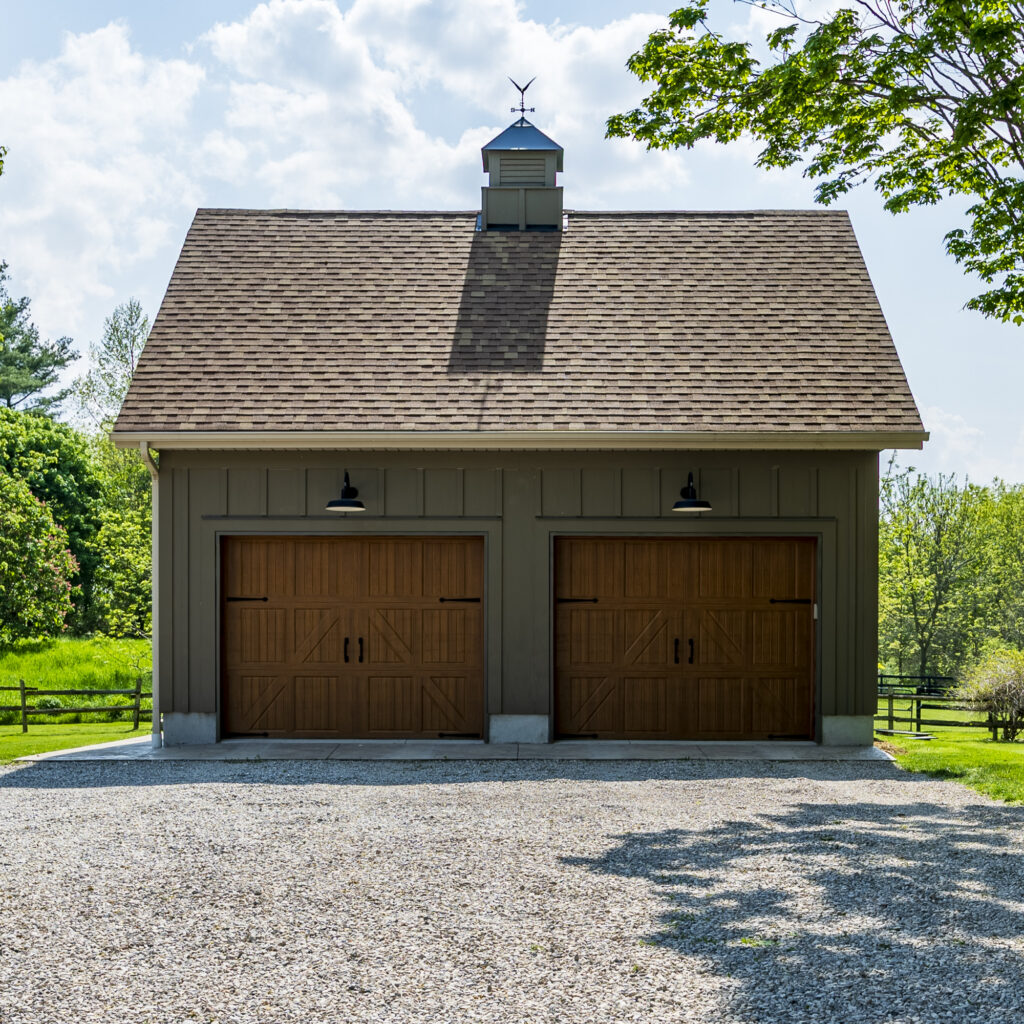
Ah detached garages—those unsung heroes of suburban landscapes.
They’re more than just places to park cars or stash holiday decorations. These beauties often have personality, charm, and maybe even a little bit of mystery. I mean, who doesn’t love a garage with peeling paint and ivy creeping up the sides? It’s like they’ve lived a whole life and have stories to tell.
Whether you’re trying to capture a Pinterest-worthy shot for your DIY blog or you just have a soft spot for standalone structures, photographing detached garages is way more fun than you’d think. You can highlight their unique quirks, like the way the sunlight hits a vintage garage door or how shadows play on weathered siding. Plus, they’re surprisingly photogenic—no complaints about camera angles or needing a touch-up before the shoot.
So, what makes them great photo subjects? For starters, they’re super versatile. From sleek modern garages to rustic workshops that look straight out of a Hallmark movie, there’s no shortage of variety. They’re also usually surrounded by interesting backdrops—think overgrown gardens, gravel driveways, or snow-covered rooftops. It’s all about finding the charm in the details.
Ready to dive in? Cool. Let’s get your camera ready and show these garages the love they deserve. They’re not just “that building next to the house,” they’re stars waiting for their moment in the spotlight.
Choosing the Right Equipment
Let’s talk gear.
You don’t need to haul around a whole photography studio to get killer shots of detached garages, but having a few solid tools in your arsenal can really level up your game. First up, grab a camera that lets you play around with settings—a DSLR or mirrorless is perfect. Pair it with a wide-angle lens to capture all the garage-y goodness and its surroundings in one frame. Trust me, you don’t want to cut off half the roof in your shot.
Now, if you’re feeling fancy, toss in a macro lens for those close-up, artsy shots of peeling paint or intricate doorknob details. And don’t forget a tripod or stabilizer, because nothing screams “rookie move” like a shaky photo. Plus, a tripod lets you take your time and nail that perfect angle without turning into a human pretzel trying to keep the camera steady.
Oh, and here’s a little pro tip: keep a microfiber cloth on hand. Dusty garage windows or smudged lenses are not the vibe we’re going for. Bonus points if you have a reflector to bounce some light onto shadowy spots or even just a piece of white foam board to fake it. Basically, think of your gear as your trusty sidekick—it’s there to make your life easier while you make those garages shine.
Understanding Lighting Conditions
Lighting can be a bit of a diva, but once you figure it out, it’s like unlocking a secret superpower for your photos.
Detached garages, in particular, love a good golden hour—seriously, they look like they’re glowing from within during that magical time after sunrise or just before sunset. It’s like nature’s Instagram filter, and you don’t even have to pay for it.
But let’s be real, not every day serves up perfect golden-hour vibes. Sometimes, you’re stuck with overcast skies or harsh midday sun, and that’s where a little creativity comes in. Overcast? Lucky you! The soft, even light is basically Mother Nature handing you a giant diffuser. Harsh sunlight? Stick to the shadows, or use something simple like a white foam board to bounce light back onto your subject.
Oh, and here’s a fun little trick—backlighting. Position the garage so the light comes from behind it. You’ll get this dreamy, halo-like effect, especially if there’s something cool like ivy or wildflowers in the foreground. Just don’t forget to adjust your camera settings to avoid turning your garage into a dark blob against the glowing sky.
And hey, if all else fails, bring your own light! A cheap LED panel or even a flashlight can work wonders for adding a little pop to those shadowy nooks and crannies.
Composing the Perfect Shot
You’ve got your gear, you’ve scoped out the lighting—now it’s time to frame that detached garage like the masterpiece it is.
The trick here? Angles, my friend. A straight-on shot might get the job done, but let’s be honest, it’s about as exciting as a DMV photo. Try stepping a little to the side or catching it from a corner—it’ll give your photo some serious dimension.
And hey, don’t be afraid to get low or go high. Crouch down to make that garage look epic or climb on something (safely!) for a bird’s-eye vibe. Bonus points if you use the surroundings to your advantage. Got a cute cobblestone driveway or a line of trees? Use them to frame the shot like nature’s picture frame.
Oh, and here’s a pro tip: leading lines. Look for pathways, fences, or rooflines that guide the viewer’s eye straight to the star of the show—your garage. It’s like the red carpet treatment but for buildings.
Lastly, watch your background. Nobody wants to see a random trash can or your neighbor’s laundry stealing the spotlight. Keep it clean and focused on the main event. Your detached garage is ready for its close-up, and with the right composition, it’s about to look like it belongs on the cover of “Garage Weekly” (not a real magazine… yet).
Highlighting Key Features
Detached garages have this sneaky way of standing out without even trying, and your job is to capture those little details that make them shine.
Start with the obvious stuff—does it have a bold, retro garage door or some charmingly crooked shutters? Maybe the siding has a weathered, textured vibe that screams, “I’ve seen some things.” Get up close and personal with these features; this is where your camera’s zoom or a macro lens becomes your best friend.
If the garage moonlights as a workshop, you’ve hit the jackpot. Snap shots of tools hanging neatly (or not-so-neatly) on the wall, or that old-school workbench covered in sawdust and half-finished projects. These kinds of details tell a story and make the space feel alive. Bonus points if you spot quirky additions like a rusty old mailbox or a patch of wildflowers peeking out from the cracks in the concrete.
And hey, don’t forget about the roofline or those funky windows that might catch some cool reflections. Sometimes, even the imperfections—peeling paint, ivy creeping up the side, or a dented door—are what give a detached garage its charm. It’s all about leaning into the personality of the space and letting those unique features take center stage.
Post-Processing Tips
Now it’s time to work a little editing magic and make those detached garages look like they belong in an art gallery (or at least a really cool Instagram feed). First things first, crank up your favorite editing app. Lightroom, Snapseed, Photoshop—whatever floats your boat. The goal here is to enhance what’s already there, not turn the garage into some unrecognizable sci-fi building.
Start with the basics: adjust the brightness and contrast to give your photo some depth and make those details pop. Got some moody shadows happening? Lean into it. Or maybe the colors feel a little blah—tweak the saturation to bring out that perfect rusty red or forest green siding. Just don’t go full neon rave unless that’s the vibe you’re going for (no judgment).
If the lines of the garage look a little wonky, straighten them out with a perspective adjustment tool—trust me, it’ll save you from squinting at your own photo later. And don’t forget to clean up little distractions, like a random leaf on the driveway or a weird lens flare. A quick touch-up can go a long way. Finally, throw on a subtle vignette to draw the eye to the garage and boom—Pinterest-worthy perfection!
Common Mistakes to Avoid
There will be those “oops” moments that can sneak up on you when photographing detached garages.
First off, watch out for sneaky clutter. A majestic garage shot can go from “wow” to “meh” real quick if there’s a rogue trash can or your neighbor’s flamingo lawn ornament photobombing the scene. Clean up the area or angle your shot to keep distractions out of frame.
Next, don’t forget to double-check your focus—nobody wants to squint at a blurry door hinge and wonder what they’re looking at. And exposure? Yeah, that’s a biggie. Don’t let your photo end up looking like the garage is glowing with the power of 1,000 suns or disappearing into shadowy nothingness. Adjust those settings so the lighting is just right.
And here’s a big one: pay attention to lines. Tilted garage shots can make the whole thing look like it’s sliding into a sinkhole. Use your camera’s grid or straighten it out in post.
Lastly, don’t over-edit. A little saturation boost is great, but turning the garage into a neon masterpiece? Maybe not. Keep it natural, and let the garage’s charm do the heavy lifting. Trust me, your photos will thank you!
Selling a property? Give us a call today and learn more about our professional photography services that can boost your property listing!
Also, explore our sister company for exclusive luxury listings you won’t want to miss. Don’t forget to tune into our new podcast for even more valuable insights!