DIY Wall Repair Hacks for Every Homeowner
Got a wall that looks like it’s seen better days? Maybe there’s a hole from an overly ambitious dart game or a ding from when someone moved furniture without checking for clearance (we’ve all been there). Whatever the culprit, fixing walls isn’t as intimidating as it might seem. In fact, with the right approach, you can tackle it yourself and save some cash while you’re at it.
The truth is, walls take a beating over time—kids, pets, furniture, and even just life in general can leave their mark. But here’s the good news: you don’t need to be a contractor to get your walls back in shape. You just need a few tools, some basic know-how, and a sprinkle of patience (okay, maybe a bit more than a sprinkle, but you’ve got this). It’s kind of like patching up a bad haircut—except with drywall instead of hair.
The secret to successful wall repair? Taking it one step at a time and not overthinking it. A little effort can make those battle-worn walls look like they’ve never been through a rough day in their life. So, let’s roll up our sleeves and give that wall the makeover it deserves. Trust me, it’s more satisfying than you’d think!
Tools and Materials Needed
Before we dive into fixing your wall, let’s make sure your toolbox is up to the task.
You’ll need some essentials: spackle knives (a couple of sizes is always handy), sandpaper (medium and fine grit), a utility knife, and a good drill. If the damage is on the bigger side, a drywall saw might come in clutch. Oh, and don’t forget a mixing tray or something to keep your compound mess in one place—no one wants a spackle-coated floor.
Now, let’s talk materials. For those little dings and nail holes, lightweight spackle or joint compound is your best bet—easy to work with and dries fast. For anything more dramatic, like fist-sized holes (no judgment on how it got there), you’ll want a drywall patch kit, which usually includes joint tape and a mesh patch. Pro tip: when buying joint compound, grab the pre-mixed kind unless you’re into playing chemist.
Got plaster walls? Then you’ll want a plaster repair mix instead of drywall compound. For brick walls, you’re in mortar or caulk territory—yes, it’s a bit more involved, but you’ll look like a rockstar when it’s done. And don’t forget safety gear: a dust mask and safety goggles will keep you from inhaling or getting drywall dust in your eyes. Trust me, nothing derails a project faster than an emergency eye rinse.
Fixing Small Holes and Dings
Let’s deal with those tiny but maddening holes—like the ones left behind by nails, thumbtacks, or that one time you “lightly” bumped the wall moving a chair (oops). First things first, wipe the area with a damp cloth to get rid of any dust or debris. No point in patching over dirt, right?
Next, grab some spackle and a spackle knife. Now, this part is kind of satisfying—scoop up a bit of spackle and spread it over the hole like you’re frosting a cupcake. Don’t skimp, but don’t go too wild either. Smooth it out so it’s slightly raised above the wall’s surface. Here’s a little trick: fan out the edges as you go to help it blend in better. No one wants a lumpy patch screaming, “Hey, I’m a repair!”
Let it dry completely. Depending on the product you’re using, this might take anywhere from 30 minutes to a few hours. Once it’s dry, it’s sanding time. Start gently with fine-grit sandpaper and smooth out the area until it feels flush with the rest of the wall. Run your hand over it—if it feels like nothing’s there, you’ve nailed it (well, not literally).
And don’t forget to vacuum or wipe down the area after sanding unless you’re aiming for a trendy “dusty chic” vibe in your living room. Just like that, you’ve banished those pesky marks.
Repairing Large Holes
Let’s tackle the big leagues—those large holes that look like your wall lost a fight.
First, you’re going to need a piece of drywall that’s slightly bigger than the hole. Tom Silva from This Old House suggests using a patch larger than the hole to provide adequate support and prevent future cracking. Cut the drywall to size, making sure it’ll fit snugly over the damaged area. Secure it in place with drywall screws—don’t be shy; you want it nice and secure.
Next up is covering those seams. Grab some joint tape and place it over the edges where the patch meets the existing wall. This step keeps things smooth and prevents the seams from cracking later. Now it’s time for joint compound. Spread a thin layer over the tape and patch, feathering the edges outward for a seamless blend. Let it dry (patience is key here), then add a second layer. If you’re feeling ambitious, you can go for a third coat for that ultra-smooth finish.
Once everything is bone dry, grab your sandpaper and start smoothing. Make sure the patched area is level with the rest of the wall—this is where your perfectionist tendencies can shine. By the time you’re done, that gaping hole will be nothing more than a distant memory.
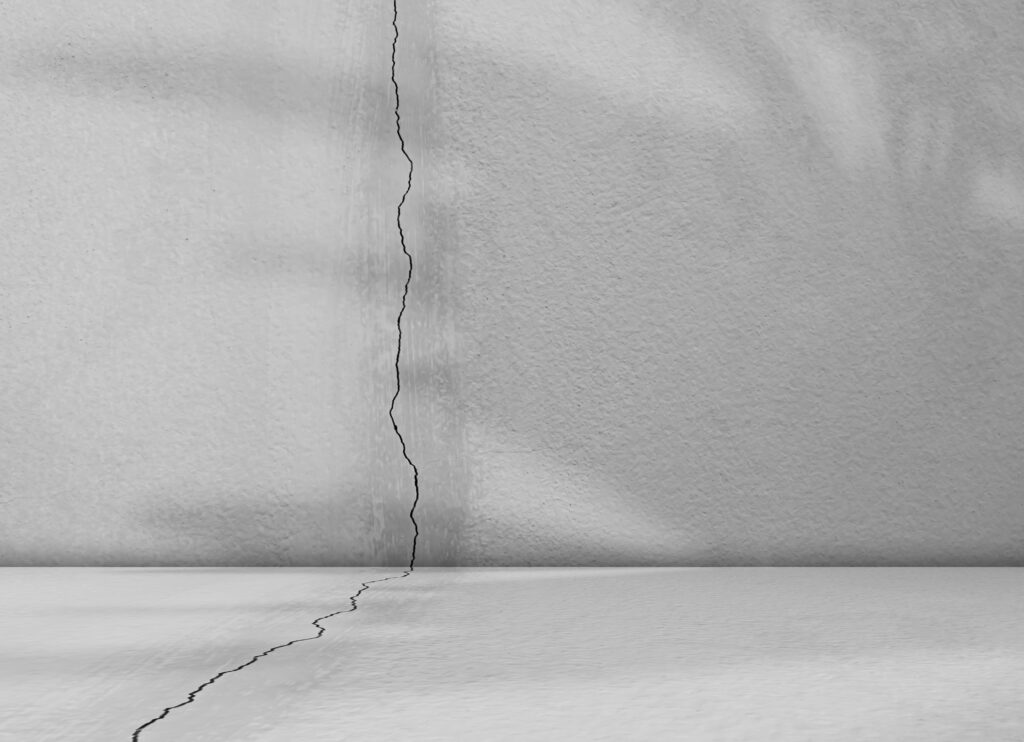
Addressing Wall Cracks
Wall cracks—annoying, right?
They’re like those mystery noises your car makes—hard to ignore and begging for attention. The good news is, fixing them isn’t rocket science. First, you’ll want to grab a utility knife and widen the crack just a bit. I know, it sounds counterintuitive, but this helps the filler stick better. Think of it like prepping a canvas for paint.
Once you’ve got that crack slightly opened up, give it a quick clean to remove any dust or debris. Then, grab your flexible filler or joint compound and start filling it in. For the bigger cracks that look like they’re plotting to split your entire wall, use some joint tape to give it extra reinforcement—kind of like giving the crack a little security blanket.
Now, smooth everything out with your spackle knife, feathering those edges so it blends into the wall. Let it dry completely (patience is key here), and if it looks like it sunk in a bit after drying, go ahead and add another layer. You’ll get bonus points for smoothing it out like a pro. And remember, cracks don’t have to ruin the vibe of your wall. With a bit of effort, it’s like they never even existed.
Finishing Touches
So your wall is patched up and looking pretty decent, but we’re not done just yet.
It’s time to make those repairs disappear like they were never there in the first place. Grab your sandpaper and gently smooth out the repaired areas. Trust me, this step is worth it—nobody wants a wall that feels like a bumpy road when you run your hand over it.
Now, here’s a hot tip: don’t skip the primer. Seriously, it’s not just some optional step that overachievers do. Primer helps the paint stick and keeps the patched spots from standing out like a sore thumb. Use a small brush or roller to cover just the fixed areas if you’re feeling precise, or go big and prime the whole wall if you’ve got the time and energy.
Once the primer’s dry, it’s painting time! Match your paint as best as you can—dig out that old paint can or take a chip from the wall to the store if you need a color match. Then, start with a little paint over the repaired area and feather it outwards so it blends with the rest of the wall. No harsh edges, no patchy spots—just smooth, seamless perfection. Bonus points if you can’t even tell where the repair was when you’re done!
Preventative Maintenance
So your wall’s looking good now—let’s keep it that way!
The best way to avoid more repairs down the line is to catch issues early. See a tiny crack forming? Don’t ignore it—it’s not going to magically fix itself. Give it a little TLC before it turns into a whole ordeal. Same goes for those little dents and dings. Fix them while they’re small, and you’ll save yourself from bigger headaches later.
Now, let’s talk humidity. Walls don’t love wild swings in moisture levels, so try to keep things steady. If you live in a humid area, a dehumidifier can be a lifesaver. And when it comes to hanging stuff, don’t be that person who skips the stud finder or proper wall anchors. Heavy items need support, or you’re just asking for trouble—and another patch job.
Lastly, keep an eye on what’s going on around your walls. Leaky pipes, roof issues, or even an overzealous plant creeping up from outside can mess with them. Spotting these kinds of problems early can save your walls from becoming collateral damage. Think of this as the “ounce of prevention” approach—it’s a whole lot easier than dealing with another round of repairs.
Selling a property? Give us a call today and learn more about our professional photography services that can boost your property listing!
Also, explore our sister company for exclusive luxury listings you won’t want to miss. Don’t forget to tune into our new podcast for even more valuable insights!