Freeze-Frame: How to Adjust Your Camera Settings for Real Estate Photography in Winter
As the winter season approaches, many real estate photographers may find themselves facing new challenges when capturing properties in the colder months. The snow-covered landscapes and shorter days can make it difficult to achieve the same high-quality shots as in other seasons. But fear not, with a few adjustments to your camera settings, you can still capture stunning freeze-frame images that will showcase the unique charm of winter in your real estate photography.
In this blog post, we’ll discuss some helpful tips on how to adapt your approach and settings to capture the perfect freeze-frame shots during the winter season. Read on!
Understanding the Challenges of Winter Real Estate Photography
When it comes to real estate photography in the winter months, there are unique challenges that photographers must face.
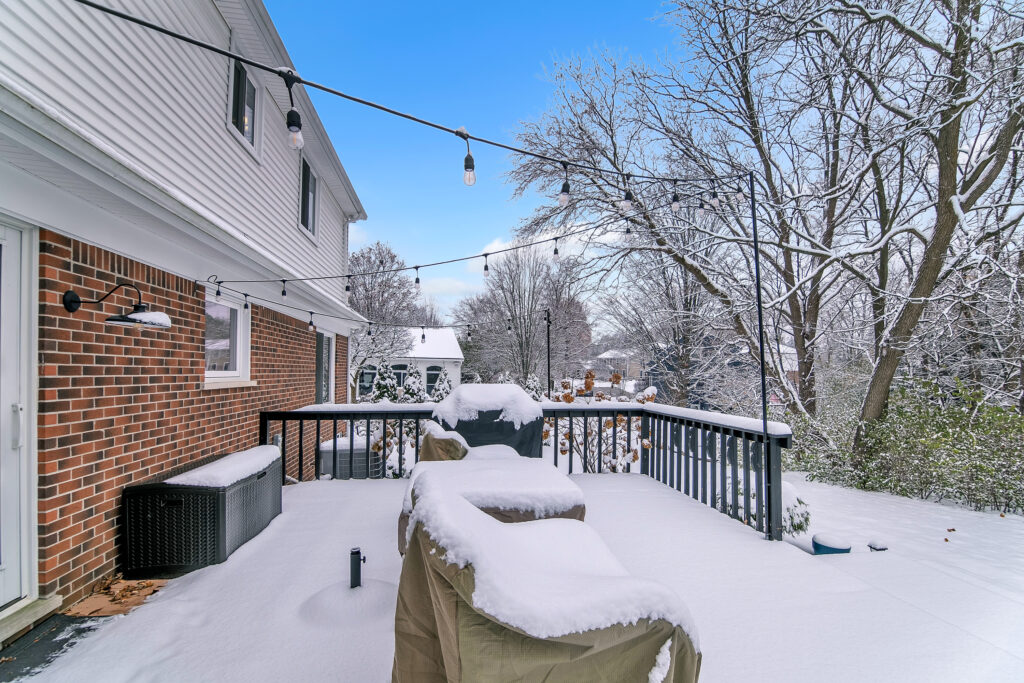
The cold weather and snow-covered landscapes can create difficulties in capturing high-quality shots. One of the main challenges is the limited daylight hours. With shorter days, photographers have a smaller window of time to work with natural lighting, which can greatly impact the overall look and feel of the photos.
Additionally, the snowy surroundings can create a bright, reflective surface that can easily wash out the image if not properly exposed. Another challenge is dealing with the cold weather itself. It can be uncomfortable and even hazardous for both the photographer and the equipment. Cold temperatures can drain battery life quickly and cause condensation to form on the camera lens. These challenges require photographers to be adaptable and creative in their approach.
Key Camera Settings for Successful Winter Shots
Winter photography can present unique challenges, but with the right camera settings, you can still capture stunning freeze-frame shots.
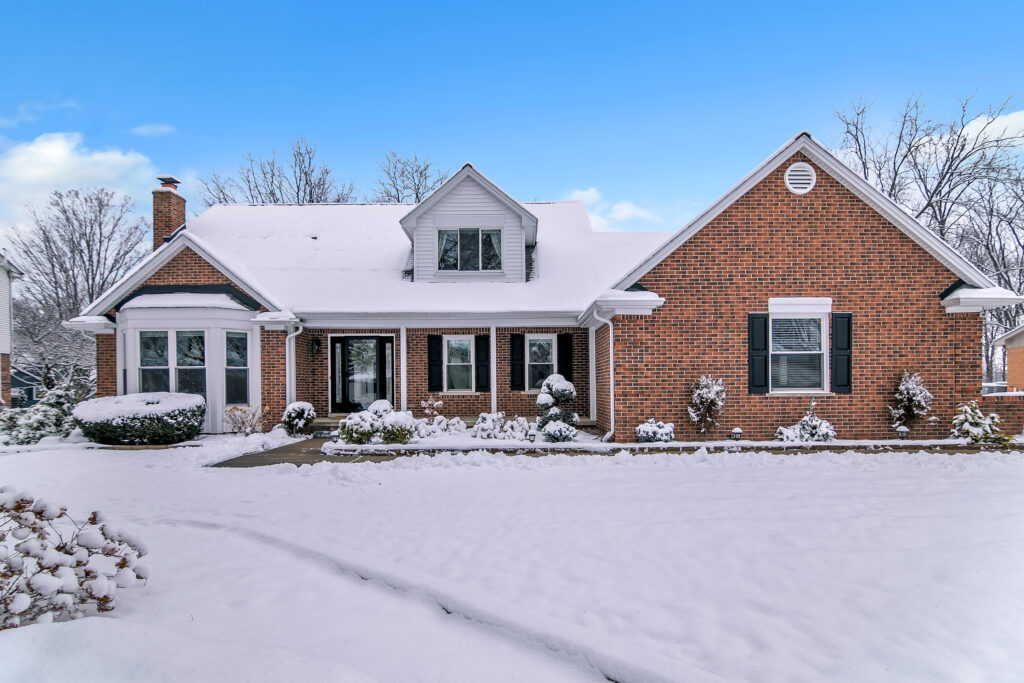
One of the key settings to adjust is the white balance. In snowy conditions, the automatic white balance setting may not accurately capture the true colors of the scene. To avoid a blue or dull image, try using the “cloudy” or “shade” white balance preset. This will add warmth to the photo and make the snow appear bright and vibrant.
Another important setting to consider is the exposure compensation. Snowy landscapes can easily fool the camera’s metering system, resulting in underexposed photos. To avoid this, increase the exposure compensation by about +1 to +2 stops. This will ensure that the snow appears white and not gray.
When shooting in low light conditions, such as during winter sunsets, it’s important to adjust the ISO setting accordingly. Increasing the ISO will make the camera more sensitive to light, allowing you to capture properly exposed images. However, be mindful of increasing the ISO too much, as it can introduce noise or grain to the photo.
Lastly, don’t forget about the shutter speed. In winter, there may be less natural light available, so adjusting the shutter speed to a slower setting can help capture more light. However, be cautious of camera shake when using a slow shutter speed. Using a tripod or stabilizing the camera against a stable surface can help prevent blurry images.
By making these adjustments to your camera settings, you can capture stunning freeze-frame shots that truly showcase the beauty of winter in your real estate photography.
Techniques to Capture Stunning Real Estate Photos in the Snow
When it comes to capturing stunning real estate photos in the snow, there are a few techniques you can use to make your images truly stand out.
First, consider the composition of your shots. The snow-covered landscapes can provide a beautiful backdrop, so look for interesting angles and perspectives to showcase the winter scenery. Experiment with different vantage points, such as shooting from a higher position to capture the entire property against the snowy landscape.
Another technique to consider is using natural elements to add visual interest to your photos. Look for objects like evergreen trees, icicles, or frost-covered branches that can enhance the winter feel of your images. These elements can help create depth and texture, making your photos more captivating.
Additionally, don’t be afraid to play with lighting in your winter shots. The soft, diffused light during overcast days can create a beautiful ambiance and help reduce harsh shadows. Consider shooting during the golden hours, just after sunrise or before sunset, to take advantage of the warm, golden light that can add a touch of magic to your images.
Lastly, don’t forget to include people or animals in your winter real estate photos. Adding a human element can help potential buyers envision themselves living in the property and enjoying winter activities like sledding or building snowmen. Animals, such as dogs playing in the snow, can also add a sense of warmth and charm to your shots.
Importance of Lighting and How to Manipulate it during Winter Months
Proper lighting is essential in any form of photography, and winter real estate photography is no exception.
The way you manipulate and utilize lighting during the winter months can significantly impact the overall look and feel of your images. With the limited daylight hours and potentially overcast skies, it’s crucial to make the most of the available light to create stunning shots.
Firstly, it’s important to be aware of the direction of light during winter. Since the sun sits lower in the sky, the light is softer and more flattering. This can create a beautiful ambiance in your photos, especially during the golden hours just after sunrise or before sunset. Take advantage of this warm, golden light to add a touch of magic and create a cozy atmosphere in your images.
Additionally, you can manipulate the lighting by using reflectors or diffusers. Reflectors bounce light onto the subject, while diffusers soften harsh light. During winter, when the light can be harsh and reflective due to snow, using a diffuser can help reduce glare and create a more balanced exposure. Similarly, using a reflector can add fill light to areas that may appear shadowed or dark.
Another way to manipulate lighting during winter is by using artificial lighting. Adding external light sources, such as off-camera flash or LED panels, can help illuminate darker areas and add depth and dimension to your images. Be mindful of the color temperature of your artificial lighting and adjust it to match the natural light for a more cohesive look.
Ultimately, the importance of lighting in winter real estate photography cannot be overstated. By understanding how to manipulate and utilize the available light, you can create stunning and captivating images that truly showcase the unique charm of winter in your real estate photography.
Top Mistakes to Avoid While Shooting Property Photos in Winters
When shooting property photos in the winter, there are some common mistakes that photographers should avoid in order to capture the best shots.
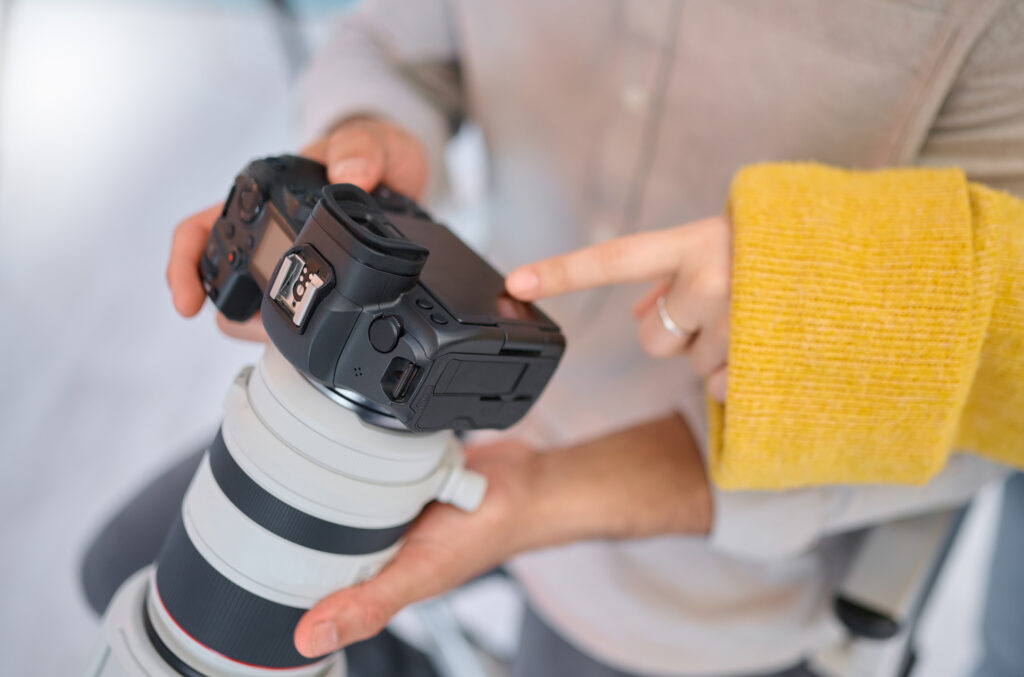
One of the top mistakes is forgetting to clean the camera lens. During the winter, snow and condensation can easily build up on the lens, resulting in blurry or hazy images. It’s important to regularly wipe the lens clean before each shot to ensure clarity and sharpness.
Another mistake is not dressing appropriately for the cold weather. Being uncomfortable or cold can distract photographers from focusing on capturing the perfect shot. Make sure to dress in warm layers and wear gloves that allow for easy camera operation. It’s also a good idea to have hand warmers on hand to keep your hands warm and dexterous.
Additionally, many photographers make the mistake of not scouting the location ahead of time. In winter, the landscape can be vastly different from other seasons, and there may be obstacles such as snow piles or icy paths that can impede your ability to get the right angle. Take the time to scout the location before the shoot to identify any potential challenges and plan your shots accordingly.
Lastly, a common mistake is not using a tripod or stabilizing the camera when shooting in low light conditions. Winter days can be cloudy and the light may be limited, leading to longer exposure times. To avoid blurry images, use a tripod or stabilize the camera on a solid surface to keep it steady.
Ready to sell your property? Give us a call today and learn more about our professional photography services that can boost your property listing!
Plus, explore our virtual assistant coaching program to level up your business. Don’t forget to tune into our new podcast for even more valuable insights!