How to Use HDR Correctly in Real Estate Photos
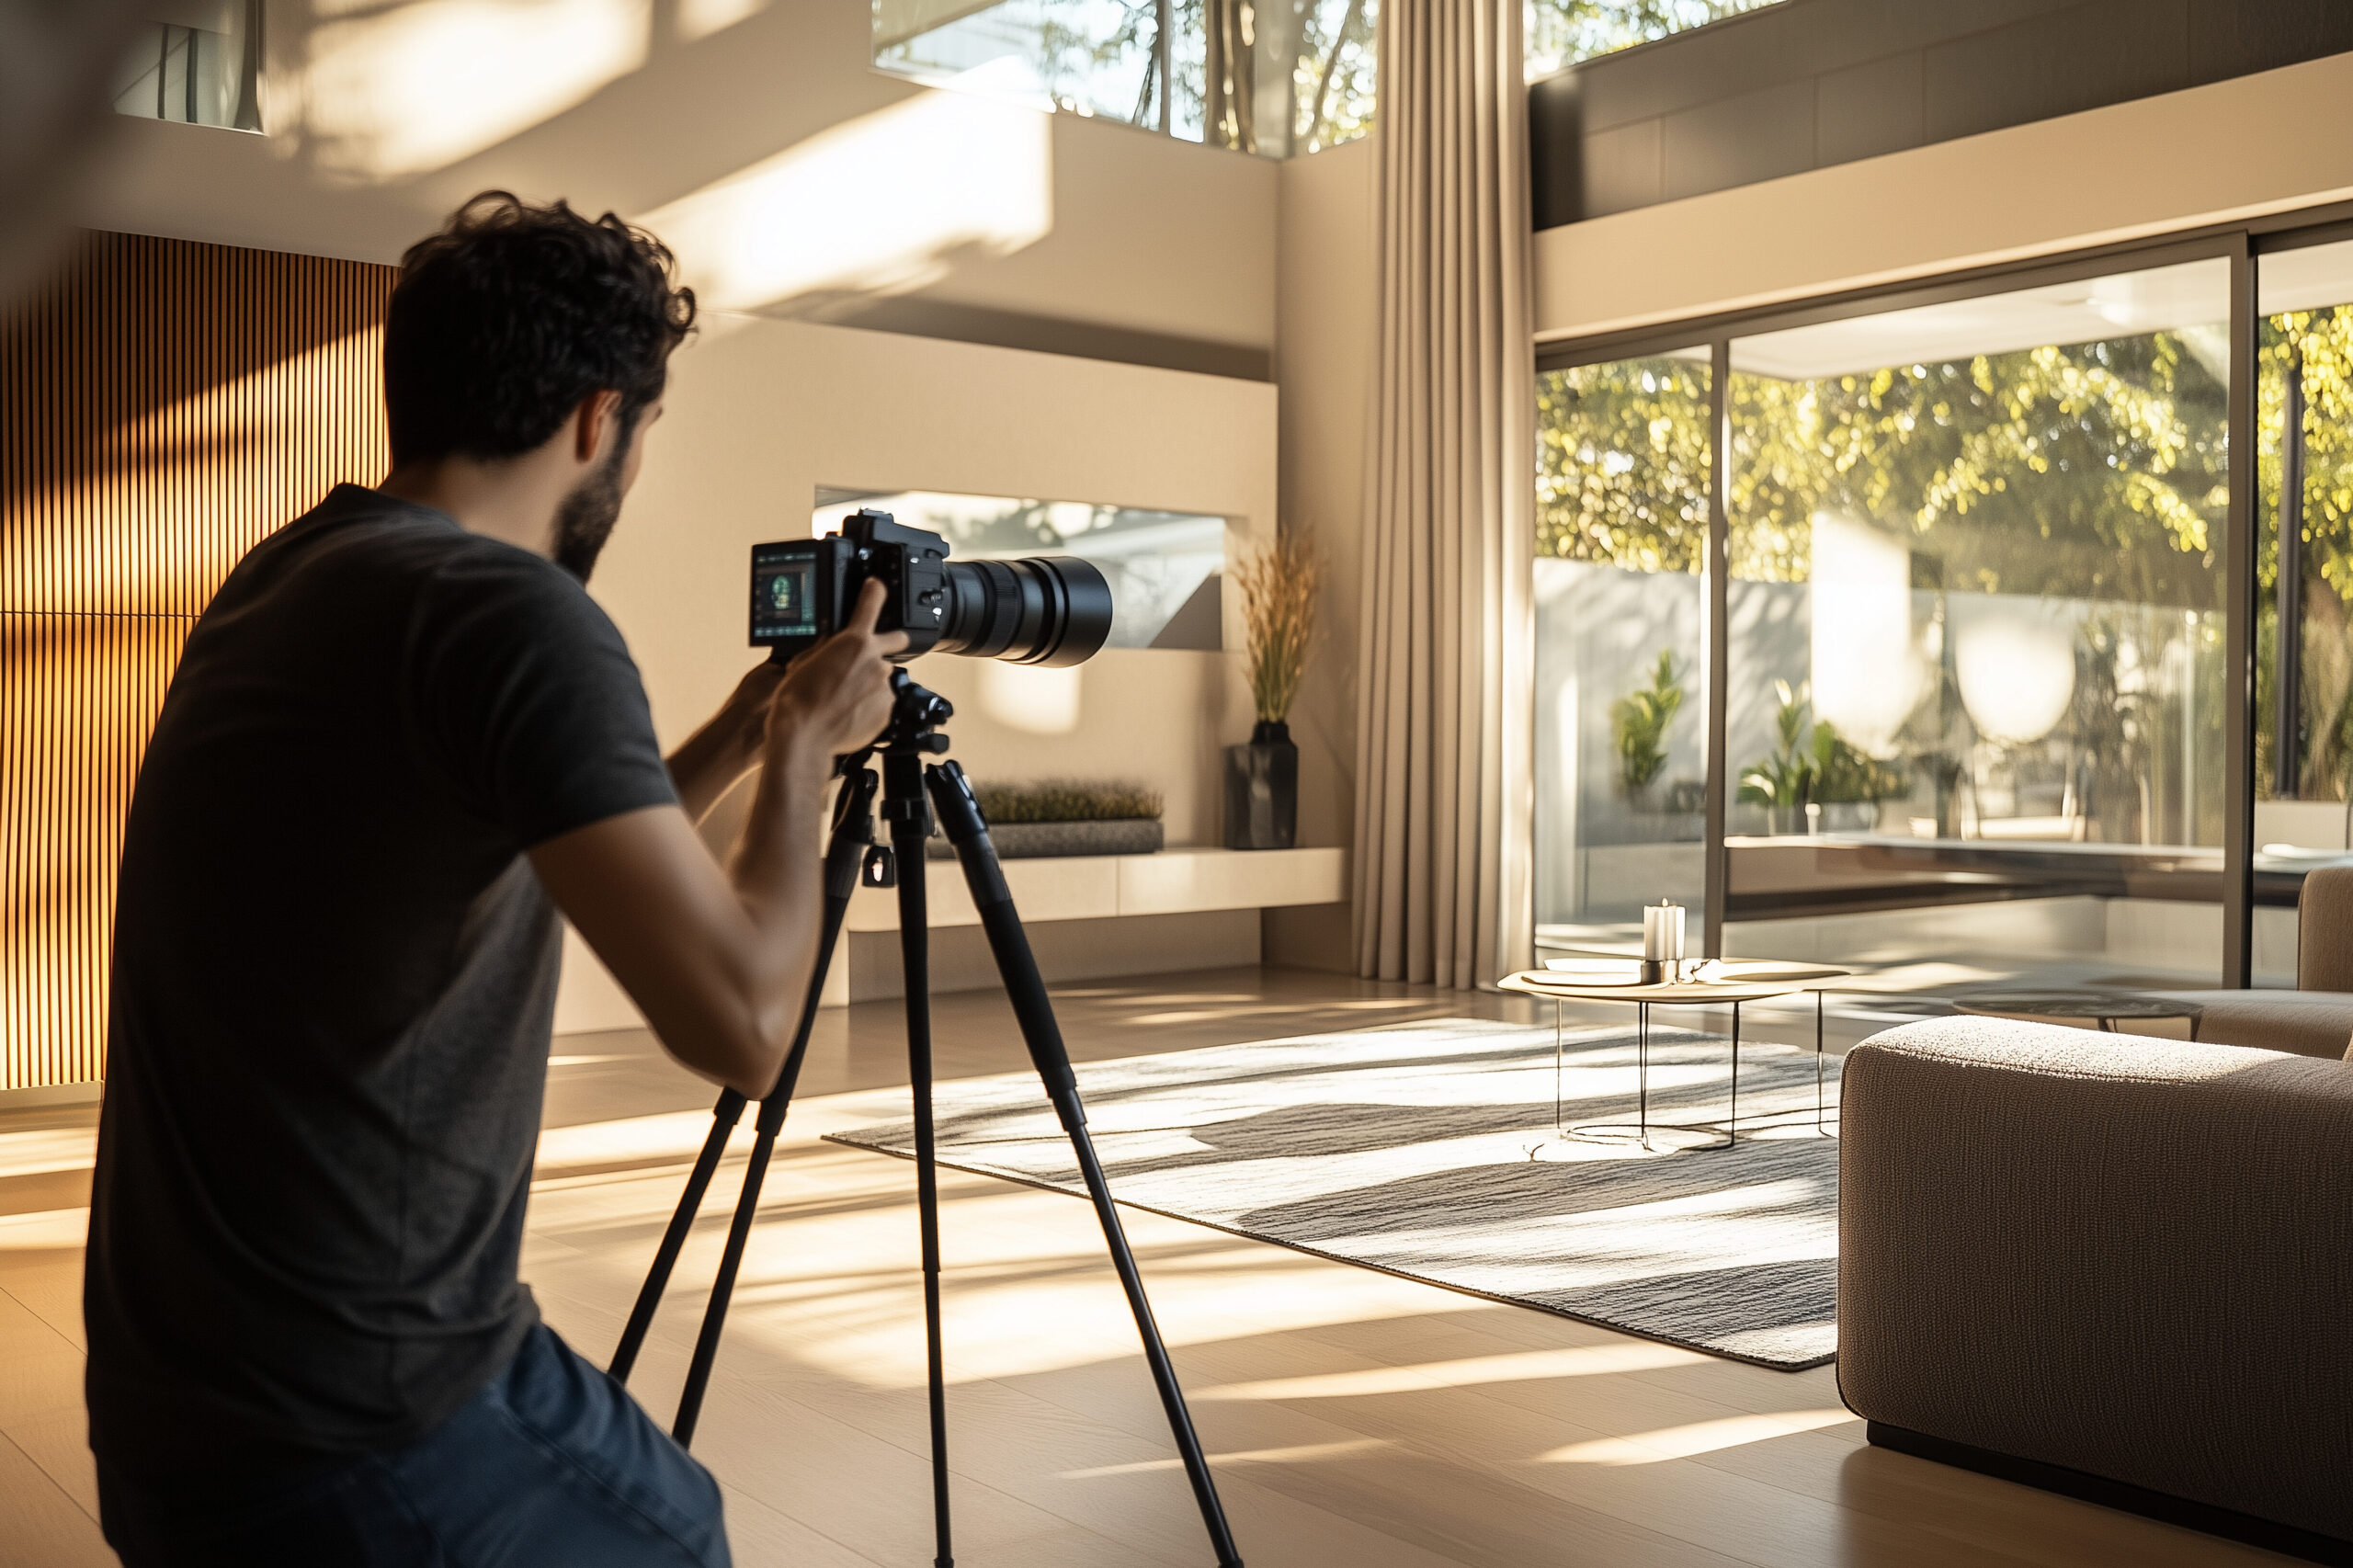
Now, picture this: you’re standing in a gorgeous, sunlit living room, your camera at the ready. The space looks stunning to your eyes, but how do you make sure that same magic translates into your photos? That’s where HDR photography swoops in like a superhero.
HDR, or High Dynamic Range, helps you capture both the bright and dark parts of a scene, balancing them out so nothing gets lost in the shadows or washed out by the light. It’s like giving your photos a pair of fancy glasses.
Now, you might be thinking, “Okay, but isn’t HDR just for those dramatic, artsy shots?” Not quite! When used correctly, HDR can be a game-changer for real estate photography. It helps you showcase properties in all their glory, from the sunny highlights to the cozy corners. The key is to use HDR subtly, so your photos look natural and inviting—not like a scene from a sci-fi flick.
So, how do you wield this powerful tool without going overboard? It starts with knowing your gear and settings. Trust me, no one wants a photo that looks like it’s been through a dozen Instagram filters. You want to highlight the property’s best features, not distract from them with over-the-top effects.
Ready to dive into the nitty-gritty of mastering HDR? Let’s get you prepped to make those real estate photos pop—without any alien invasions.
Setting Up for Success
So, you’re ready to nail those killer HDR shots, huh?
First things first: get your camera settings in check. Think of it like adjusting the thermostat—you want that sweet spot where everything feels just right. Your exposure settings need to be spot on. If they’re too high or too low, your photos will be a hot mess.
And let’s not forget your trusty tripod. That thing is your best buddy here. Ever tried taking a sharp photo with shaky hands? It’s like trying to draw a straight line on a bumpy road. No bueno.
Speaking of gear, make sure you’re packing a camera that can shoot in RAW format. Why RAW? Because it captures way more detail, giving you the flexibility you need when you’re blending those images later. If your camera can bracket exposures (take multiple shots at different exposures), even better! This is HDR’s bread and butter.
Next up, think about the lighting in the room. Natural light is your friend, but it can also be tricky. You don’t want the sun blasting through the windows like it’s trying to steal the show. Pull those curtains if you need to, and use additional lighting to even things out. A good flash setup can be a lifesaver.
Now that you’ve got your settings dialed in and your gear prepped, you’re all set to capture some stunning HDR shots. Time to make those properties look like they belong on the cover of a magazine!
Software and Techniques
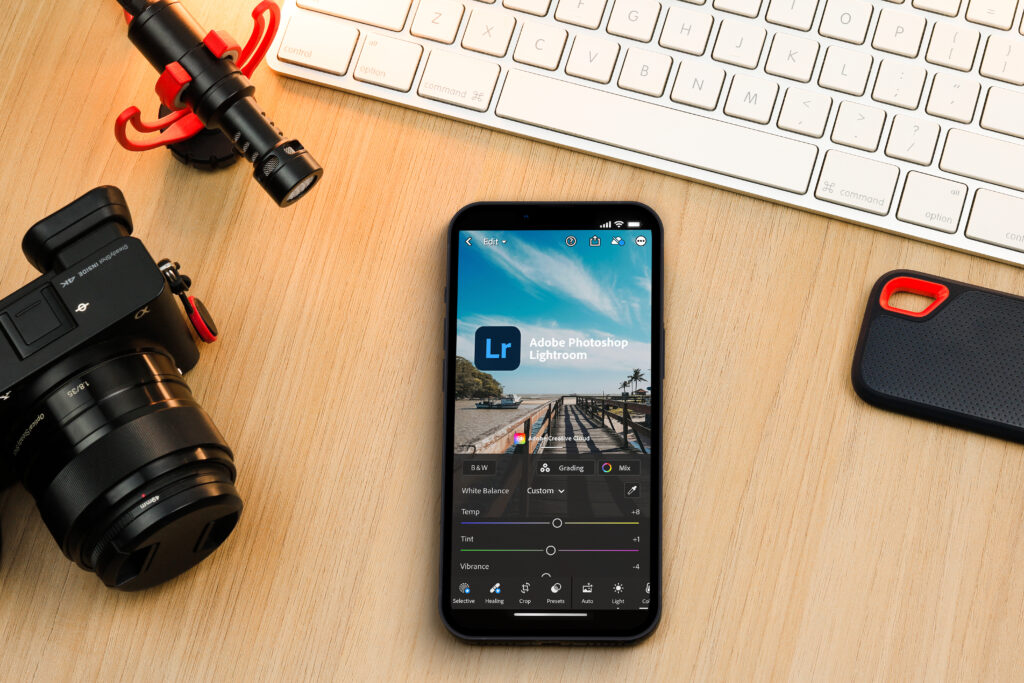
So, you’ve got your gear all set up and now it’s time to hit the digital darkroom.
When it comes to software, you’ve got a smorgasbord of options. But here’s the scoop: not all software is gonna cut it for real estate photography. You want something that keeps your photos looking crisp and real, like you’re walking through the property in person.
One solid choice is Adobe Lightroom. It’s the Swiss Army knife of photo editing—tons of features and pretty intuitive to use. Plus, it’s great for merging those bracketed shots you’ve taken. Another good option is Photomatix. It’s specifically geared towards HDR and offers presets that can save you a ton of time.
Alright, so you’ve picked your weapon of choice. Now, how do you use it without turning the property into a sci-fi movie set? The trick is in the blending. You want to layer your exposures in a way that enhances the room’s natural light and shadow play. Avoid the temptation to crank up the sliders to max. Subtlety is your friend here.
And hey, if you’re feeling overwhelmed, most of these programs come with some pretty slick tutorials. Don’t be afraid to dive into those. Even seasoned pros look up tips and tricks. Remember, the goal is to make your photos inviting and true to life, not like they’ve been zapped by some kind of magic ray gun. Keep it real, keep it classy, and your photos will shine.
Avoiding Over-Processing

Let’s talk about the cardinal sin of HDR: over-processing.
You know those photos that look like someone went wild with the neon markers? Yeah, we’re trying to avoid that. The trick here is to enhance without going overboard. You want to give the space a boost, not turn it into a circus.
First off, ease up on the saturation. If the colors in your photos are shouting louder than a street vendor, pull back. Real estate buyers aren’t looking for a rainbow explosion—they want a home. Similarly, keep an eye on the contrast. Cranking it up too high can make your photos look harsh and artificial, like they’re straight out of a comic book.
And don’t even get me started on the clarity slider. It’s tempting to max it out, but you’ll end up with photos that look gritty and uninviting. You want people to feel like they can walk right into the room, not like they need a hazmat suit.
The key is subtlety. Small adjustments can make a big difference, so take it easy on those sliders. Your goal is to create images that feel welcoming and true-to-life. Keep it natural, and you’ll have potential buyers feeling like they’re already home.
Post-Processing Best Practices
Once you’ve merged those images, it’s time to finesse them with some post-processing.
The secret here is balance. Keep brightness and contrast in check to maintain a sense of realism. You want the light to look like it belongs in the room, not as if it’s being beamed from another dimension. And don’t forget about color accuracy.
Colors should be true to life, helping potential buyers imagine their own furniture in the space. After all, high-quality photos can significantly boost a property’s perceived value for 83% of buyers.
Client Communication and Expectations

Okay, so you’ve got the skills to create some jaw-dropping HDR photos, but let’s talk about managing your clients’ expectations.
First off, lay down the basics for them. Explain that HDR can make their property look amazing, but it won’t magically add square footage or turn a fixer-upper into a palace. You’re a photographer, not a wizard!
When you’re chatting with your clients, be upfront about what HDR can and can’t do. Show them some before-and-after shots to give them a clear idea. It’s all about setting realistic expectations. You want them to be thrilled with the final images, not scratching their heads wondering why their tiny kitchen doesn’t look like it belongs in a gourmet magazine.
Also, get them involved in the process. Ask them what features of the property they want to highlight. Is it the cozy fireplace? The massive windows? Understanding their vision helps you deliver exactly what they’re hoping for. Plus, it makes them feel like they’re part of the magic.
And hey, if they start throwing around terms like “Can you make it look more… you know, dreamy?”—gently steer them back to reality. Explain that while a bit of artistic flair is great, the goal is to create inviting and realistic photos that attract buyers. You want potential buyers to feel like they can move in tomorrow, not like they’ve stepped into a fairy tale.
So, keep the lines of communication open and honest. Your clients will appreciate the transparency, and you’ll build a solid reputation as someone who knows how to deliver the goods without any smoke and mirrors.
Bottom Line
We’ve covered a lot of ground here on how to nail HDR photography in real estate without making it look like a sci-fi adventure.
The key takeaways? Get your settings and gear in check, use the right software, and keep those edits subtle. Trust me, less is more when it comes to making those properties look both inviting and true to life.
Now, let’s talk resources. If you’re itching to learn more, there are loads of tutorials and forums where pros share their secrets. Adobe’s website has some killer tutorials for Lightroom, and Photomatix has a great community for HDR tips. Don’t shy away from YouTube either; it’s a goldmine for quick tips and tricks.
Books? Oh yeah, there are some fantastic reads out there. Check out “Real Estate Photography: Mastering the Art” by Ron Castle if you’re looking for in-depth guidance. It’s like having a mentor right on your bookshelf.
And hey, networking never hurts. Join some photography groups, either locally or online. Facebook groups and photography forums can be super helpful. You can swap tips, get feedback, and maybe even score some client leads.
Remember, the goal here is to make your photos pop without going overboard. Keep practicing, stay curious, and don’t be afraid to experiment a little. You’ve got this! Keep shooting, keep learning, and watch your portfolio—and client list—grow. Cheers to capturing those dream homes in the best light possible!
Selling a property? Give us a call today and learn more about our professional photography services that can boost your property listing!
Also, explore our sister company for exclusive luxury listings you won’t want to miss. Don’t forget to tune into our new podcast for even more valuable insights!