
Mastering Shots in Rooms With Light From Different Directions
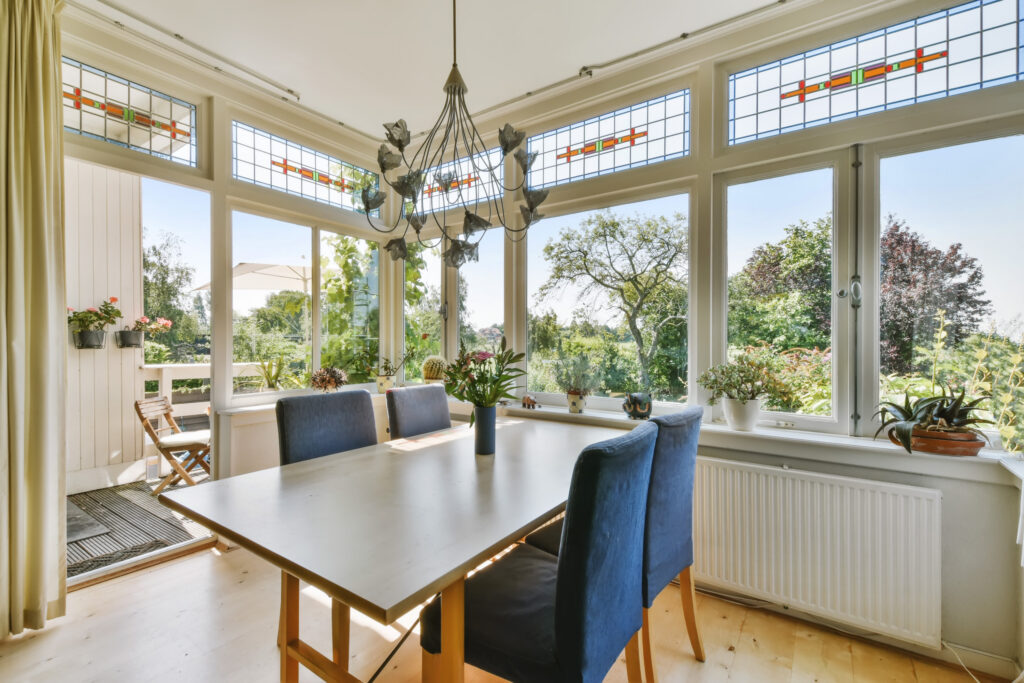
Oh, the joys of photographing a room with light coming at you from every which way—sounds like a dream, right? Well, sort of. Shooting rooms with multiple windows is like hosting a party where every guest insists on being the center of attention. The light from each window has its own personality, and your job is to wrangle them all into playing nice together. It’s tricky, sure, but it’s also the kind of challenge that keeps things exciting (and occasionally makes you question your life choices).
Picture this: you walk into a room, and it’s basically a light circus. Sunbeams are bouncing off walls, shadows are having a field day, and your camera is blinking at you like, “What do you want me to do with this?” The good news? Once you learn to harness all those competing light sources, you’ll be able to create some seriously stunning shots. And hey, who doesn’t love a little light drama?
The trick is to embrace the chaos without letting it overwhelm you. Remember, light is your partner in crime here—it might be a little unpredictable, but with the right approach, you’ll turn that room into your personal masterpiece studio. Just think of yourself as the room’s director, orchestrating all that natural light into one flawless performance. Now let’s get to it!
Understanding Light Directions
Light—our favorite unruly guest—likes to come crashing into a room from all sorts of angles, doesn’t it?
To make sense of it all, you’ve got to become a bit of a light whisperer. First things first: figure out where the light’s sneaking in. The sun isn’t exactly known for sitting still—it moves all day, shifting how light floods the room. One minute, it’s a soft glow, and the next, it’s basically auditioning for a spotlight role. Each window adds its own unique spin, like a bunch of backup singers trying to steal the show.
The key here? Observation. Take a moment to study how the light behaves as it pours in from different directions. Maybe one window gives off soft, dreamy vibes, while another is throwing harsh shadows all over the place like it’s mad about something. The trick is learning how to blend all these personalities into something cohesive.
Pro tip: don’t just think about where the light’s coming from—consider what it’s bouncing off of, too. A white wall might spread the light around evenly, while a dark surface might gobble it up like it’s hoarding all the attention. This whole light thing? It’s not just about the windows. It’s about everything the light touches. (Cue The Lion King soundtrack in your head—you know you want to.)
Choosing the Right Time of Day
When it comes to shooting a room, timing is everything—like catching the perfect wave, but, you know, with sunlight.
The time of day can completely change the vibe of your photos, so you’ve got to plan ahead. Morning light? Soft, subtle, and gentle—kind of like it hasn’t had its coffee yet. Afternoon light, on the other hand, can be a little more in-your-face, but it’s also great for bringing out bold contrasts and textures. And then there’s the evening light, aka the drama queen of the group, casting long, moody shadows and giving everything a golden glow that just screams “fancy magazine spread.”
But don’t be fooled—midday light can be a bit of a wild card. It’s bright, harsh, and unforgiving, kind of like that one friend who always tells it like it is (even when you didn’t ask). The shadows at this time are sharper, and you might find yourself fighting with overexposure. If you’re up for a challenge, though, midday light can still work—you just need to tame it, maybe with some curtains or a trusty reflector.
Oh, and don’t forget to check where the sun’s hanging out in the sky! If it’s beaming directly through a window, it’s going to flood the room with light that’s either magical or maddening. Timing really is everything, my friend.
Equipment and Settings for Multi-Window Rooms
Now, let’s talk gear—because even the most skilled photographer needs a little help when dealing with a room that’s basically a light explosion.
First things first: keep that ISO low. Why? Because higher ISO = more noise, and trust me, you don’t want your bright, beautiful photo looking like it’s been taken with a potato. Pair that with a faster shutter speed to handle all the light chaos coming through those windows like they’re competing in a spotlight Olympics.
A tripod? Absolute lifesaver. Not only does it keep your shots steady, but it also lets you experiment with different angles without feeling like you’re auditioning for Cirque du Soleil. Got one of those sneaky windows blasting harsh light into the room? A reflector can work wonders by bouncing some of that light to even things out. If you don’t have one, improvise! A white poster board or even a piece of foil can get the job done—MacGyver style.
And don’t forget to play with your aperture settings. Wide apertures can create that dreamy, soft-focus look while smaller apertures keep everything sharp and crisp, which is perfect for rooms with a lot of details screaming for attention. So grab your camera, fiddle with those settings, and remember: the right gear and a little experimenting can turn light chaos into photo gold.
Composition Techniques for Multiple Windows
Let’s talk composition, aka how to make all those windows and light beams look like they actually belong in the same photo.
First up, decide who the star of the show is. Is it the windows themselves, casting dramatic light patterns? Or is it the cozy couch that’s sitting there, minding its own business? Once you’ve picked your hero, everything else in the frame should support that story.
If you’re including the windows, use them as natural frames—basically letting them act like picture frames for whatever’s outside or inside the room. Bonus points if you’ve got a killer view. Not feeling the windows? No problem! Focus on what the light is doing to the rest of the room. Maybe it’s highlighting a beautiful texture on a rug or making a houseplant look like it’s straight out of a home décor catalog.
And hey, don’t forget about symmetry! If the windows are evenly spaced or aligned in a cool way, use that to create a balanced, satisfying shot. But if they’re a little off-kilter, lean into the quirkiness—embrace the “perfectly imperfect” vibe. Just remember, with multiple windows, you’re working with layers of light and shapes. Treat it like a puzzle, and have fun finding the perfect arrangement!
Post-Processing Tips
So, you’ve captured your shots, and now it’s time to dive into the editing phase—the part where you sprinkle a little magic and make those photos shine. First things first, let’s tackle the exposure. With light pouring in from different directions, chances are some spots might be a little too bright while others are hanging out in the shadows like they’re trying to stay mysterious. Adjust the highlights and shadows to balance everything out. Think of it like smoothing out a lumpy pancake batter—no one wants unevenness.
Color correction? Oh yeah, that’s your best friend. Sometimes all those light sources can make colors go a little haywire. One window’s giving you warm, golden tones, while another’s throwing in a cool blue vibe. Use those handy temperature sliders to get everything back on the same page, like a band finally tuning their instruments.
And don’t sleep on the power of subtle tweaks! A little boost in contrast can make textures pop, and playing with the saturation can bring out the room’s personality without making it look like a neon sign. Oh, and if you notice any funky lens distortion from wide angles, fix that too—no one wants wobbly windows stealing the show. The goal? Keep it natural, but with a little extra pizzazz.
Common Mistakes and How to Avoid Them
Oh, the classic pitfalls of shooting rooms with multiple windows—been there, done that, got the overexposed photos to prove it.
One biggie? Forgetting that light changes throughout the day. Remember, the sun’s position isn’t static, so its light dance will change the room’s mood as hours tick by. If you’re not paying attention, you could end up with photos that feel more “mood swing” than “artistic vision.”
Another common oops moment? Letting harsh light completely steal the show. If a window is beaming like it’s auditioning for Broadway, don’t fight it—work with it. Grab a diffuser or sheer curtain to soften the light and save yourself the headache during editing.
And let’s talk about clutter. With all that light dancing around, even the smallest mess can become a giant distraction. So, do yourself a favor and tidy up before you start snapping. Trust me, that forgotten coffee mug in the corner will stick out like a sore thumb. The secret? Stay flexible, keep an eye on the details, and don’t let the chaos intimidate you. You’ve got this—light drama and all!
Selling a property? Give us a call today and learn more about our professional photography services that can boost your property listing!
Also, explore our sister company for exclusive luxury listings you won’t want to miss. Don’t forget to tune into our new podcast for even more valuable insights!