Preparing Your Home for Real Estate Photos: Your Essential Photoshoot Checklist
Are you selling your home and need to prepare for real estate photos? Don’t stress; with the right photoshoot checklist, you can make sure your home looks its best for the pictures.
Taking the time to spruce up the interior and exterior of your home can make a world of difference when it comes to creating attractive, eye-catching photos for potential buyers.
Read on to discover what you need to do to get your home ready for the perfect real estate photos!
Why Good Real Estate Photos Matter

Selling a home can be an overwhelming process, and it all begins with making a great first impression.
In today’s digital age, the majority of homebuyers begin their search online, scrolling through thousands of listings in a matter of seconds. Therefore, having top-quality photos is a critical component in making your home stand out from the competition. Good real estate photos are crucial because they can either make or break a buyer’s first impression of your property.
High-quality images showcase your home in the best light, highlighting its unique features and capturing its charm. Good photos are not just about making your home look nice; they can also help buyers imagine themselves living there. A photo can speak volumes about the overall feeling and style of a home. It’s not enough to simply describe a property’s assets, features, and benefits – buyers want to see it for themselves.
Great real estate photos can attract more potential buyers, increase the likelihood of showings, and ultimately, drive up the value of your home. On the other hand, low-quality or unappealing photos can make your home look dull, uninviting, or worse, in disrepair. Poor photos can discourage potential buyers from visiting your property and might even lead to lower offers.
In summary, when it comes to selling your home, great photos are essential for getting the best results. Investing in quality real estate photography is one of the smartest moves you can make when listing your home. A picture is worth a thousand words, and great photos can make a significant difference in the outcome of your real estate sale.
Decluttering and Cleaning Tips
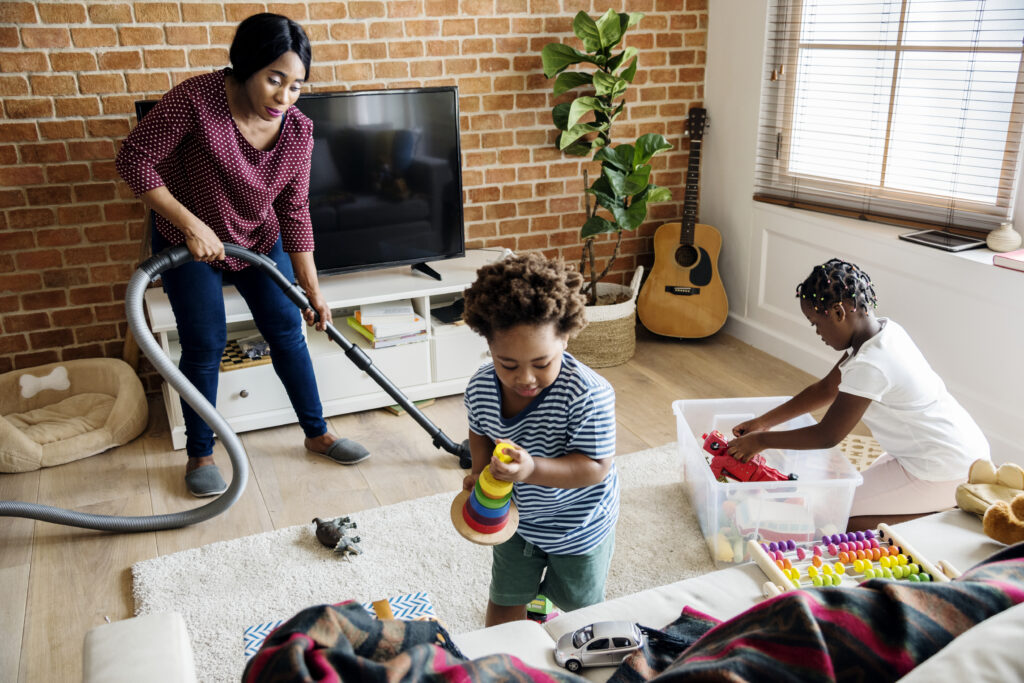
When it comes to preparing your home for real estate photos, decluttering and cleaning are essential tasks. Not only will a clean and clutter-free home make for better photos, but it will also help prospective buyers see the potential in your space.
Here are some tips to get your home ready for its close-up:
- Clear Out Clutter. One of the most important things you can do is to declutter your space. This means getting rid of anything that is not necessary, including excess furniture, knick-knacks, and personal items. You want to create an environment that is neutral and allows potential buyers to picture themselves living in your space.
- Deep Clean. Once you have cleared out the clutter, it’s time to give your home a thorough deep clean. Pay special attention to the kitchen and bathrooms, as these are often the areas that potential buyers scrutinize the most. Clean all surfaces, including floors, counters, and appliances. Don’t forget to clean the windows and mirrors to ensure maximum light enters the room.
- Organize and Store. After you’ve decluttered and cleaned, organize what’s left and store it away. This will not only make your home look more spacious, but it will also keep everything in its place. Be sure to store away any personal items, such as family photos, so that potential buyers can envision themselves in your space.
- Keep it Fresh. One of the easiest ways to make your home look more inviting is to add some fresh flowers or greenery. This will not only add color and texture to your photos but will also make your home feel more welcoming.
By following these decluttering and cleaning tips, you’ll be able to create an environment that is visually appealing and welcoming to potential buyers. Remember, first impressions are everything, so make sure your home is looking its best before the real estate photoshoot.
Lighting and Color Tips
In order to ensure that your real estate photos showcase your home in the best possible light, you’ll need to pay attention to the lighting and color. These two elements can have a huge impact on the overall look and feel of your home, so it’s important to get them right.
Here are some lighting and color tips to keep in mind when preparing for your real estate photoshoot:
- Maximize natural light. Natural light is always best for photos, so make sure to open up all your curtains and blinds to let in as much light as possible. If you have any dark or poorly-lit rooms, consider adding extra lamps or light fixtures to brighten them up.
- Avoid harsh lighting. While natural light is great, harsh or direct lighting can create unflattering shadows and glare in your photos. If you have any particularly bright or direct light fixtures, try swapping them out for softer, more diffuse lighting.
- Stick to a neutral color palette. When it comes to colors, neutral is always best for real estate photos. Stick to light, neutral shades for walls, furniture, and decor. This will create a clean, cohesive look in your photos and help potential buyers envision themselves in the space.
- Coordinate your colors. While neutrals are important, it’s also important to coordinate your colors throughout your home. Try to stick to a consistent color palette so that your photos have a cohesive look and feel. This will also make your home feel more put-together and visually appealing to potential buyers.
- Avoid bold patterns and textures. While you may love your funky wallpaper or bright accent pillows, they can be distracting in real estate photos. Stick to simple, clean lines and textures to create a timeless look that will appeal to a wider range of potential buyers.
By paying attention to lighting and color, you can help ensure that your real estate photos are as visually appealing as possible. This can make a huge difference in attracting potential buyers and ultimately selling your home more quickly.
Furniture and Staging Tips
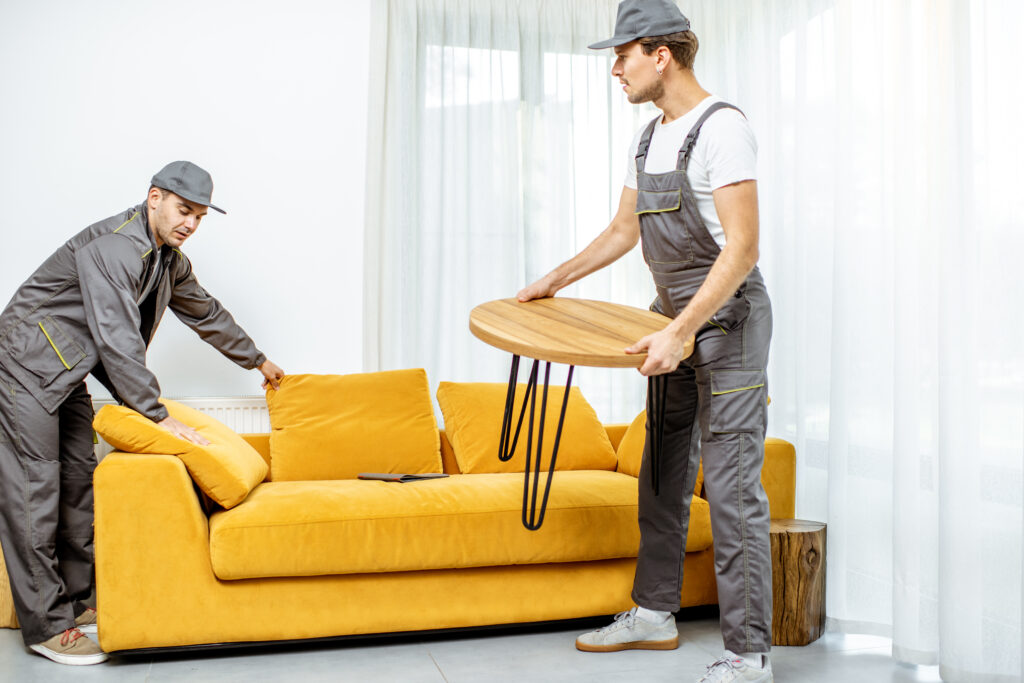
The furniture and decor in your home can either enhance or detract from the overall appeal of your real estate photos. It’s important to stage your home in a way that showcases its best features and creates an inviting atmosphere.
Here are some tips to help you do just that:
- Remove Clutter. The first step to creating an appealing interior is to remove any unnecessary clutter. This includes old magazines, paperwork, and knick-knacks. Put away personal items like family photos, so potential buyers can imagine themselves in the space.
- Create Flow. Make sure that furniture is arranged in a way that creates an easy flow from one room to the next. This will make the home feel larger and more inviting.
- Highlight Key Features. Use your furniture to highlight key features of the home. If you have a stunning fireplace or beautiful view, make sure that it’s visible and not hidden behind furniture.
- Choose Neutral Colors. While bold colors can be fun, they can also be distracting. Instead, stick to neutral colors when choosing furniture and decor. This will create a calming atmosphere and allow potential buyers to focus on the space itself.
- Keep it Simple. When it comes to staging your home, less is often more. Choose a few key pieces of furniture that complement the space and leave it at that. You want to create a cozy atmosphere, but you also don’t want the space to feel cluttered or overwhelming.
By following these furniture and staging tips, you’ll be well on your way to creating a warm and inviting space for your real estate photoshoot. Remember, the goal is to showcase the best features of your home and make potential buyers feel at home in the space.
Exterior and Curb Appeal Tips
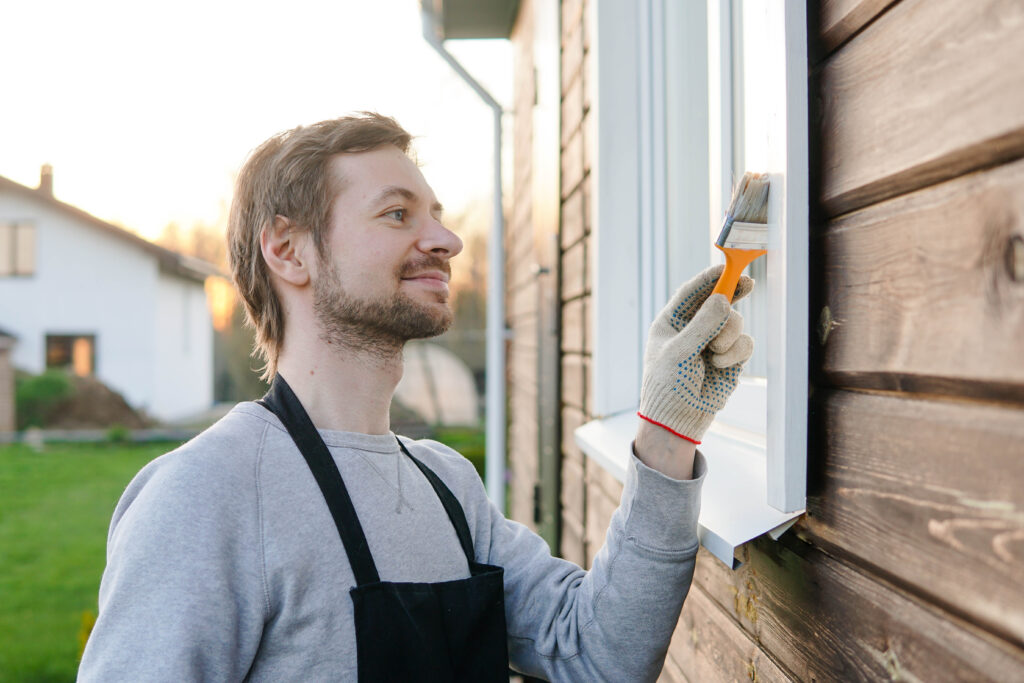
The exterior of your home is the first thing potential buyers will see, so it’s important to make a good impression.
Here are some tips for making your home’s exterior and curb appeal photo-ready:
- Spruce up your landscaping. Mow the lawn, trim the hedges, and pull any weeds or dead plants. Add some color with fresh flowers or potted plants near the entryway.
- Clear out the clutter. Remove any items that detract from the curb appeal, such as old toys, bikes, or yard tools. Store garbage cans and recycling bins out of sight.
- Check the paint and siding. Touch up any chipped or peeling paint, and power wash any dirty siding or brick. Make sure the windows are clean and in good condition.
- Stage the entryway. Make sure the front door is clean and in good repair. Add a new welcome mat and some potted plants or flowers. If you have a porch or stoop, add some outdoor furniture or a colorful rug to create an inviting atmosphere.
- Enhance the lighting. Make sure all outdoor lights are working and replace any burned-out bulbs. Add some string lights or lanterns to create a warm and welcoming ambiance.
Remember, the goal is to make your home look well-maintained, welcoming, and attractive to potential buyers. A little effort to enhance your home’s exterior and curb appeal can go a long way in creating great real estate photos.
Final Checks and Preparations
Before the photographer arrives to take your real estate photos, it’s important to make some final checks and preparations to ensure that everything is perfect.
Firstly, take a walk around the entire house and check for any last-minute clutter that may have been overlooked. Remove any personal items such as family photos, religious icons or political memorabilia as these can be distracting for potential buyers. Clear any surfaces that you want to showcase in the photos, including counters, mantels, and tables.
Next, ensure that all the lights in the house are working correctly. You want to show off every corner of your home, and that requires ample lighting. Check that all the bulbs are functioning and that the light fixtures themselves are free of any grime or dirt.
Make sure that all the curtains and blinds are opened, allowing natural light to flood into your home. Natural light helps to enhance the beauty of the property and make it look more inviting.
Double-check that everything is dust-free and clean. Don’t forget to mop the floors, dust off the ceiling fans, and polish any mirrors or other reflective surfaces. Clean windows are also essential for great real estate photos. Ensure that they are smudge-free and let in plenty of natural light.
Lastly, ensure that everything is in its correct position. The photographer will need to move around the house to take pictures from different angles. Therefore, you want to make sure that the furniture, décor, and any other items are placed where you want them to be. Avoid moving anything while the photographer is there as it may affect the photos.
Taking these steps will ensure that your home is in perfect condition for the photographer’s arrival and will enable you to get the best real estate photos possible. A well-prepared house can make a significant difference in the quality of the photos and ultimately help you to sell your home faster.
Ready to sell your property? Give us a call today and learn more about our professional photography services and marketing that can boost your property listing!
Plus, explore our virtual assistant coaching program to level up your business. Don’t forget to tune into our new podcast for even more valuable insights!